Computer Vision - Experiment 14 - Watershed algorithm experiment

计算机视觉 - 实验十四 分水岭算法实验

Computer Vision - Experiment 14 - Watershed algorithm experiment

Experimental objectives and requirements

  Understand the basic principles of the watershed algorithm; master the code writing method to implement the watershed algorithm.

Experiment content

   (i) New project .

   (ii) Configuring OpenCV in VS2015.

   (iii) Load the original image and display it, initialize the mask and grayscale map;

   (iv) Finding the contours;

   (v) Copy the mask.

   (vi) loop to draw out the contours;

   (vii) traversing the watershed image to save it;

   (viii) Mix the grayscale and watershed effect maps and display the final window.

Experimental apparatus, equipment

  A computer with Windows 7 operating system and Visual Studio 2015 installed.

Experimental principle

   (i) In many practical applications, we need to segment the loft image, but cannot get useful information from the background image. Watershed algorithm is often very effective in this regard. This algorithm can transform the edges of the image into “mountains” and uniform areas into “valleys” so as to help segment the target. Watershed algorithm is a mathematical morphological segmentation method based on topological theory. The basic idea is to consider the image as a topological landscape in geodesic terms, and the gray value of each pixel in the image represents the elevation of the point. The concept and formation of the watershed can be illustrated by simulating the immersion process: on the surface of each local minima, a small hole is pierced, and then the whole model is slowly immersed in water. As the immersion deepens, the influence domain of each local minima slowly expands outward, and a dam is constructed at the confluence of the two catchment basins, i.e., the watershed is formed.

   (ii) The watershed algorithm implemented by the function watershed is one of the marker-based segmentation algorithms. Before passing the image to the function, we need to roughly outline the regions of the image that are expected to be segmented, and they are labeled as positive indices. So, each region is labeled with pixel values 1, 2, 3, etc., indicating that it becomes one or more connected components. The values of these markers can be retrieved by a binary mask using the findContours function and the drawContours function.

Experimental steps

   (i) Create the Visual Studio 2015 console application;

   (ii) Configure OpenCV in Visual Studio 2015;

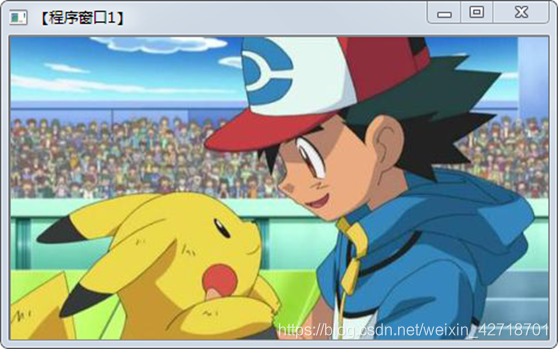
   (iii) Calling the imread function to load the original image and display it, initializing the mask and grayscale map;

   (iv) Calling the findContours function to find contours;

   (v) Copy the mask.

   (vi) call the drawContours function to loop through the contours;

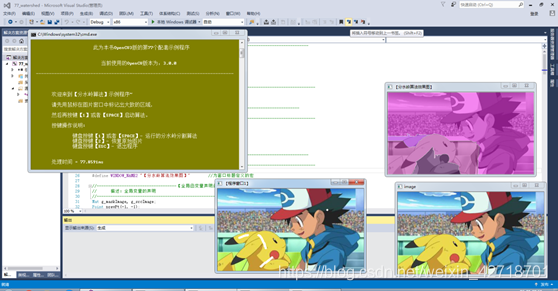
   (vii) Call the watershed function to calculate the watershed, using a double-layer loop to traverse the watershed image and save it;

   (viii) Blend the grayscale and watershed effect maps and display the final window.

Experimental notes

   (i) The method of configuring OpenCV in VS after completing the installation of OpenCV;

   (ii) The functions and usage of the watershed function;

   (iii) The method of traversing the saved watershed images;

   (iv) The method of mixing grayscale and watershed effect maps.

Experimental results

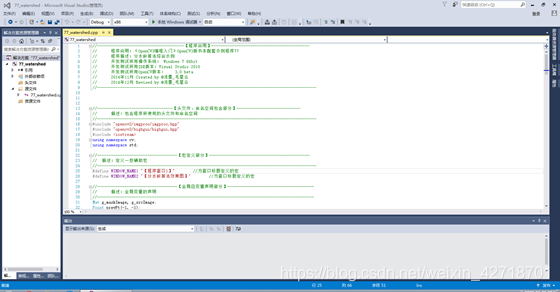
   (i) Experimental code

  1
  2
  3
  4
  5
  6
  7
  8
  9
 10
 11
 12
 13
 14
 15
 16
 17
 18
 19
 20
 21
 22
 23
 24
 25
 26
 27
 28
 29
 30
 31
 32
 33
 34
 35
 36
 37
 38
 39
 40
 41
 42
 43
 44
 45
 46
 47
 48
 49
 50
 51
 52
 53
 54
 55
 56
 57
 58
 59
 60
 61
 62
 63
 64
 65
 66
 67
 68
 69
 70
 71
 72
 73
 74
 75
 76
 77
 78
 79
 80
 81
 82
 83
 84
 85
 86
 87
 88
 89
 90
 91
 92
 93
 94
 95
 96
 97
 98
 99
100
101
102
103
104
105
106
107
108
109
110
111
112
113
114
115
116
117
118
119
120
121
122
123
124
125
126
127
128
129
130
131
132
133
134
135
136
137
138
139
140
141
142
143
144
145
146
147
148
149
150
151
152
153
154
155
156
157
158
159
160
161
162
163
164
165
166
167
168
169
170
171
172
173
174
175
176
177
178
179
180
181
182
183
184
185
//---------------------------------【头文件、命名空间包含部分】----------------------------
//		描述:包含程序所使用的头文件和命名空间
//------------------------------------------------------------------------------------------------
#include "opencv2/imgproc/imgproc.hpp"
#include "opencv2/highgui/highgui.hpp"
#include <iostream>
using namespace cv;
using namespace std;

//-----------------------------------【宏定义部分】-------------------------------------------- 
//  描述:定义一些辅助宏 
//------------------------------------------------------------------------------------------------ 
#define WINDOW_NAME1 "【程序窗口1】"        //为窗口标题定义的宏 
#define WINDOW_NAME2 "【分水岭算法效果图】"        //为窗口标题定义的宏

//-----------------------------------【全局函变量声明部分】--------------------------------------
//		描述:全局变量的声明
//-----------------------------------------------------------------------------------------------
Mat g_maskImage, g_srcImage;
Point prevPt(-1, -1);

//-----------------------------------【全局函数声明部分】--------------------------------------
//		描述:全局函数的声明
//-----------------------------------------------------------------------------------------------
static void ShowHelpText();
static void on_Mouse( int event, int x, int y, int flags, void* );


//-----------------------------------【main( )函数】--------------------------------------------
//		描述:控制台应用程序的入口函数,我们的程序从这里开始执行
//-----------------------------------------------------------------------------------------------
int main( int argc, char** argv )
{	
	//【0】改变console字体颜色
	system("color 6F"); 

	//【0】显示帮助文字
	ShowHelpText( );

	//【1】载入原图并显示,初始化掩膜和灰度图
	g_srcImage = imread("1.jpg", 1);
	imshow( WINDOW_NAME1, g_srcImage );
	Mat srcImage,grayImage;
	g_srcImage.copyTo(srcImage);
	cvtColor(g_srcImage, g_maskImage, COLOR_BGR2GRAY);
	cvtColor(g_maskImage, grayImage, COLOR_GRAY2BGR);
	g_maskImage = Scalar::all(0);

	//【2】设置鼠标回调函数
	setMouseCallback( WINDOW_NAME1, on_Mouse, 0 );

	//【3】轮询按键,进行处理
	while(1)
	{
		//获取键值
		int c = waitKey(0);

		//若按键键值为ESC时,退出
		if( (char)c == 27 )
			break;

		//按键键值为2时,恢复源图
		if( (char)c == '2' )
		{
			g_maskImage = Scalar::all(0);
			srcImage.copyTo(g_srcImage);
			imshow( "image", g_srcImage );
		}

		//若检测到按键值为1或者空格,则进行处理
		if( (char)c == '1' || (char)c == ' ' )
		{
			//定义一些参数
			int i, j, compCount = 0;
			vector<vector<Point> > contours;
			vector<Vec4i> hierarchy;

			//寻找轮廓
			findContours(g_maskImage, contours, hierarchy, RETR_CCOMP, CHAIN_APPROX_SIMPLE);

			//轮廓为空时的处理
			if( contours.empty() )
				continue;

			//拷贝掩膜
			Mat maskImage(g_maskImage.size(), CV_32S);
			maskImage = Scalar::all(0);

			//循环绘制出轮廓
			for( int index = 0; index >= 0; index = hierarchy[index][0], compCount++ )
				drawContours(maskImage, contours, index, Scalar::all(compCount+1), -1, 8, hierarchy, INT_MAX);

			//compCount为零时的处理
			if( compCount == 0 )
				continue;

			//生成随机颜色
			vector<Vec3b> colorTab;
			for( i = 0; i < compCount; i++ )
			{
				int b = theRNG().uniform(0, 255);
				int g = theRNG().uniform(0, 255);
				int r = theRNG().uniform(0, 255);

				colorTab.push_back(Vec3b((uchar)b, (uchar)g, (uchar)r));
			}

			//计算处理时间并输出到窗口中
			double dTime = (double)getTickCount();
			watershed( srcImage, maskImage );
			dTime = (double)getTickCount() - dTime;
			printf( "\t处理时间 = %gms\n", dTime*1000./getTickFrequency() );

			//双层循环,将分水岭图像遍历存入watershedImage中
			Mat watershedImage(maskImage.size(), CV_8UC3);
			for( i = 0; i < maskImage.rows; i++ )
				for( j = 0; j < maskImage.cols; j++ )
				{
					int index = maskImage.at<int>(i,j);
					if( index == -1 )
						watershedImage.at<Vec3b>(i,j) = Vec3b(255,255,255);
					else if( index <= 0 || index > compCount )
						watershedImage.at<Vec3b>(i,j) = Vec3b(0,0,0);
					else
						watershedImage.at<Vec3b>(i,j) = colorTab[index - 1];
				}

				//混合灰度图和分水岭效果图并显示最终的窗口
				watershedImage = watershedImage*0.5 + grayImage*0.5;
				imshow( WINDOW_NAME2, watershedImage );
		}
	}

	return 0;
}


//-----------------------------------【onMouse( )函数】---------------------------------------
//		描述:鼠标消息回调函数
//-----------------------------------------------------------------------------------------------
static void on_Mouse( int event, int x, int y, int flags, void* )
{
	//处理鼠标不在窗口中的情况
	if( x < 0 || x >= g_srcImage.cols || y < 0 || y >= g_srcImage.rows )
		return;

	//处理鼠标左键相关消息
	if( event == EVENT_LBUTTONUP || !(flags & EVENT_FLAG_LBUTTON) )
		prevPt = Point(-1,-1);
	else if( event == EVENT_LBUTTONDOWN )
		prevPt = Point(x,y);

	//鼠标左键按下并移动,绘制出白色线条
	else if( event == EVENT_MOUSEMOVE && (flags & EVENT_FLAG_LBUTTON) )
	{
		Point pt(x, y);
		if( prevPt.x < 0 )
			prevPt = pt;
		line( g_maskImage, prevPt, pt, Scalar::all(255), 5, 8, 0 );
		line( g_srcImage, prevPt, pt, Scalar::all(255), 5, 8, 0 );
		prevPt = pt;
		imshow(WINDOW_NAME1, g_srcImage);
	}
}


//-----------------------------------【ShowHelpText( )函数】----------------------------------  
//      描述:输出一些帮助信息  
//----------------------------------------------------------------------------------------------  
static void ShowHelpText()  
{  
	//输出欢迎信息和OpenCV版本
	printf("\n\n\t\t\t非常感谢购买《OpenCV3编程入门》一书!\n");
	printf("\n\n\t\t\t此为本书OpenCV3版的第77个配套示例程序\n");
	printf("\n\n\t\t\t   当前使用的OpenCV版本为:" CV_VERSION );
	printf("\n\n  ----------------------------------------------------------------------------\n");

	//输出一些帮助信息  
	printf(  "\n\n\n\t欢迎来到【分水岭算法】示例程序~\n\n");  
	printf(  "\t请先用鼠标在图片窗口中标记出大致的区域,\n\n\t然后再按键【1】或者【SPACE】启动算法。"
		"\n\n\t按键操作说明: \n\n"  
		"\t\t键盘按键【1】或者【SPACE】- 运行的分水岭分割算法\n"  
		"\t\t键盘按键【2】- 恢复原始图片\n"  
		"\t\t键盘按键【ESC】- 退出程序\n\n\n");  
}  

   (ii) Show results

Watershed algorithm experiment 1

Watershed algorithm experiment 2

Watershed algorithm experiment 3

Watershed algorithm experiment 4

Experiment Summary

  The main content of this experiment is to understand the basic principle of the watershed algorithm; to master the code writing method to implement the watershed algorithm. Create a new project, configure OpenCV in VS2015, load the original image and display it, initialize the mask and grayscale map, find the contours, copy the mask, loop through the contours, save the watershed image traversal, mix the grayscale and watershed effect maps and display the final window.

Built with Hugo
Theme Stack designed by Jimmy