Computer Vision - Experiment 6 - Haff transform experiment

计算机视觉 - 实验六 哈夫变换实验

Computer Vision - Experiment 6 - Haff transform experiment

Experimental objectives and requirements

  Understand the basic principle of Haff transform; master the code writing method to implement Haff transform using OpenCV.

Experiment content

   (i) Create a new project.

   (ii) Configuring OpenCV in VS2015.

   (iii) Implement the Haff transform to detect line segments using the functions in OpenCV.

Experimental instruments, equipment

  A computer with Windows 7 operating system and Visual Studio 2015 installed

Experimental principle

   (i) In the field of image processing and computer vision, how to extract the required feature information from the current image is the key to image recognition. In many applications fieldsh need to detect straight lines or circles quickly and accurately, one of the very effective ways to solve the problem is the Haff transform.

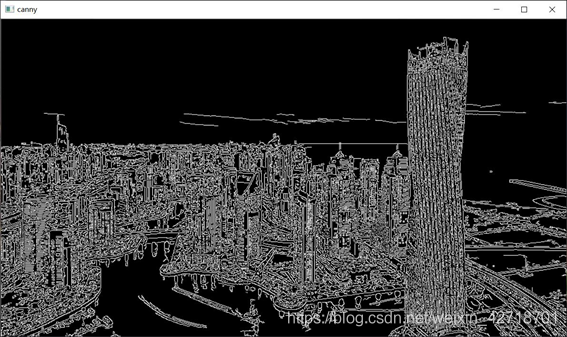
   (ii) Haff line transform is a method used to find straight lines. Before using Haff line transform, the image is first processed for edge detection, i.e., the direct input of Haff line transform can only be edge binary image.

   (iii) In OpenCV, the HoughLines function can be used to call the standard Haff transform and the multiscale Haff transform. And the HoughLinesP function is used to invoke the cumulative probability Hough transform. The cumulative probability Hough transform is executed very efficiently, and we prefer to use the HoughLinesP function compared to the HoughLines function.

Experimental steps

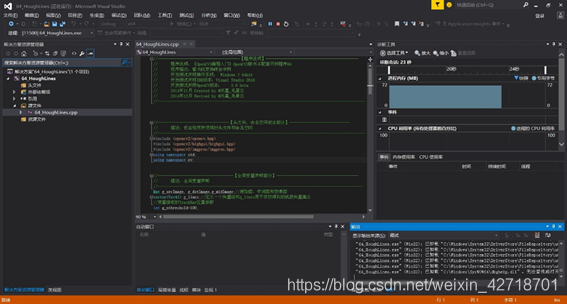
   (i) Create the Visual Studio 2015 console program;

   (ii) Configure OpenCV in Visual Studio 2015;

   (iii) Write code to implement the Haff line transform to detect line segments using the HoughLines or HoughLinesP function.

Experimental notes

   (i) Configure OpenCV in VS after completing the installation of OpenCV;

   (ii) The functions and usage of HoughLines or HoughLinesP functions.

Experimental results

   (i) Experimental code
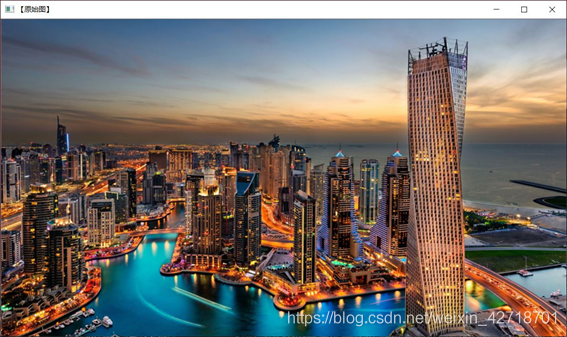
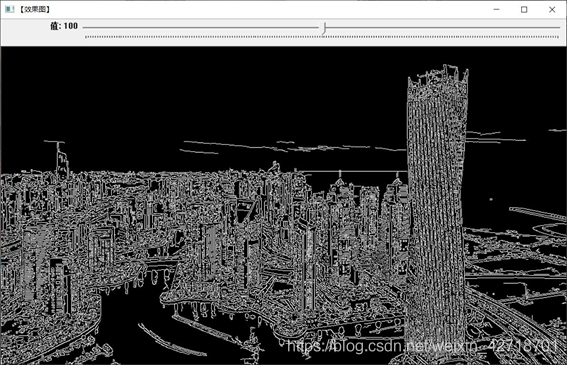
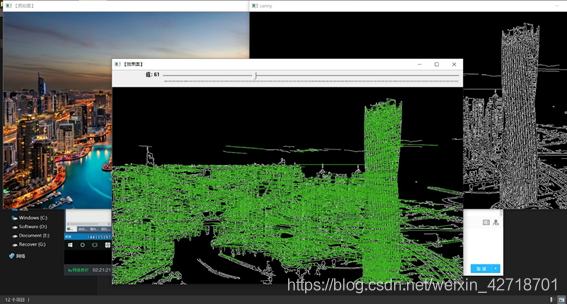
  1
  2
  3
  4
  5
  6
  7
  8
  9
 10
 11
 12
 13
 14
 15
 16
 17
 18
 19
 20
 21
 22
 23
 24
 25
 26
 27
 28
 29
 30
 31
 32
 33
 34
 35
 36
 37
 38
 39
 40
 41
 42
 43
 44
 45
 46
 47
 48
 49
 50
 51
 52
 53
 54
 55
 56
 57
 58
 59
 60
 61
 62
 63
 64
 65
 66
 67
 68
 69
 70
 71
 72
 73
 74
 75
 76
 77
 78
 79
 80
 81
 82
 83
 84
 85
 86
 87
 88
 89
 90
 91
 92
 93
 94
 95
 96
 97
 98
 99
100
101
102
103
104
105
106
107
108
109
110
111
112
113
114
115
//--------------------------------【头文件、命名空间包含部分】----------------------------
//		描述:包含程序所使用的头文件和命名空间
//-------------------------------------------------------------------------------------
#include <opencv2/opencv.hpp>
#include <opencv2/highgui/highgui.hpp>
#include <opencv2/imgproc/imgproc.hpp>
using namespace std;
using namespace cv;


//--------------------------------【全局变量声明部分】-----------------------------------
//		描述:全局变量声明
//-------------------------------------------------------------------------------------
Mat g_srcImage, g_dstImage,g_midImage;//原始图、中间图和效果图
vector<Vec4i> g_lines;//定义一个矢量结构g_lines用于存放得到的线段矢量集合
//变量接收的TrackBar位置参数
int g_nthreshold=100;

//--------------------------------【全局函数声明部分】-----------------------------------
//		描述:全局函数声明
//-------------------------------------------------------------------------------------

static void on_HoughLines(int, void*);//回调函数
static void ShowHelpText();


//-------------------------------【main( )函数】-----------------------------------------
//		描述:控制台应用程序的入口函数,我们的程序从这里开始
//-------------------------------------------------------------------------------------
int main( )
{
	//改变console字体颜色
	system("color 4F");  

	ShowHelpText();

	//载入原始图和Mat变量定义   
	Mat g_srcImage = imread("1.jpg");  //工程目录下应该有一张名为1.jpg的素材图

	//显示原始图  
	imshow("【原始图】", g_srcImage);  

	//创建滚动条
	namedWindow("【效果图】",1);
	createTrackbar("值", "【效果图】",&g_nthreshold,200,on_HoughLines);

	//进行边缘检测和转化为灰度图
	Canny(g_srcImage, g_midImage, 50, 200, 3);//进行一次canny边缘检测
	imshow("canny", g_midImage);
	cvtColor(g_midImage,g_dstImage, COLOR_GRAY2BGR);//转化边缘检测后的图为灰度图

	//调用一次回调函数,调用一次HoughLinesP函数
	on_HoughLines(g_nthreshold,0);
	HoughLinesP(g_midImage, g_lines, 1, CV_PI/180, 80, 50, 10 );
	

	//显示效果图  
	imshow("【效果图】", g_dstImage);  


	waitKey(0);  

	return 0;  

}


//---------------------------------【on_HoughLines( )函数】------------------------------
//		描述:【顶帽运算/黑帽运算】窗口的回调函数
//-------------------------------------------------------------------------------------
static void on_HoughLines(int, void*)
{
	//定义局部变量储存全局变量
	Mat dstImage=g_dstImage.clone();
	Mat midImage=g_midImage.clone();

	//调用HoughLinesP函数
	//CV_EXPORTS_W void HoughLinesP(InputArray image, OutputArray lines,
	//	double rho, double theta, int threshold,
	//	double minLineLength = 0, double maxLineGap = 0);
	//image: 必须是二值图像,推荐使用canny边缘检测的结果图像; 
	//rho: 线段以像素为单位的距离精度,double类型的,推荐用1.0
	//theta: 线段以弧度为单位的角度精度,推荐用numpy.pi / 180
	//threshod : 累加平面的阈值参数,int类型,超过设定阈值才被检测出线段,值越大,基本上意味着检出的线段越长,检出的线段个数越少。根据情况推荐先用100试试
	//lines:这个参数的意义未知,发现不同的lines对结果没影响,但是不要忽略了它的存在 
	//minLineLength:线段以像素为单位的最小长度,根据应用场景设置 
	//maxLineGap:同一方向上两条线段判定为一条线段的最大允许间隔(断裂),超过了设定值,则把两条线段当成一条线段,值越大,允许线段上的断裂越大,越有可能检出潜在的直线段

	vector<Vec4i> mylines;
	HoughLinesP(midImage, mylines, 1, CV_PI/180, g_nthreshold+1, 50, 10 );

	//循环遍历绘制每一条线段
	for( size_t i = 0; i < mylines.size(); i++ )
	{
		Vec4i l = mylines[i];
		line( dstImage, Point(l[0], l[1]), Point(l[2], l[3]), Scalar(23,180,55), 1, LINE_AA);
	}
	//显示图像
	imshow("【效果图】",dstImage);
}

//--------------------------------【ShowHelpText( )函数】--------------------------------
//		描述:输出一些帮助信息
//-------------------------------------------------------------------------------------
static void ShowHelpText()
{
	//输出欢迎信息和OpenCV版本
	printf("\n\n\t\t\t非常感谢购买《OpenCV3编程入门》一书!\n");
	printf("\n\n\t\t\t此为本书OpenCV3版的第64个配套示例程序\n");
	printf("\n\n\t\t\t   当前使用的OpenCV版本为:" CV_VERSION );
	printf("\n\n  ----------------------------------------------------------------------------\n");

	//输出一些帮助信息
	printf("\n\n\n\t请调整滚动条观察图像效果~\n\n");
}

   (ii) Show results

Haff transform experiment 1

Haff transform experiment 2

Haff transform experiment 3

Haff transform experiment 4

Haff transform experiment 5

Experiment Summary

  The main content of this experiment is to understand the basic principle of Haff transform; master the code writing method to implement Haff transform using OpenCV. Create a new project, configure OpenCV in VS2015, and use the functions in OpenCV to implement the Haff transform to detect line segments. Use the HoughLines function to call the standard Haff transform and the multi-scale Haff transform, and the HoughLinesP function to call the cumulative probability Haff transform. By writing code, I learned to use the HoughLines function to call the standard Haff transform and the multiscale Haff transform, and the HoughLinesP function to call the cumulative probability Hough transform.

Built with Hugo
Theme Stack designed by Jimmy