Computer Vision - Experiment 9 - Find and draw convex packets of objects experimentally

计算机视觉 - 实验九 寻找和绘制物体的凸包实验

Computer Vision - Experiment 9 - Find and draw convex packets of objects experimentally

Experimental aims and requirements

  Understand the basic principles of using convex packets; master the method of writing code to understand object shapes or corridors by convex packets using OpenCV.

Experiment content

   (i) Create a new project.

   (ii) Configuring OpenCV in VS2015.

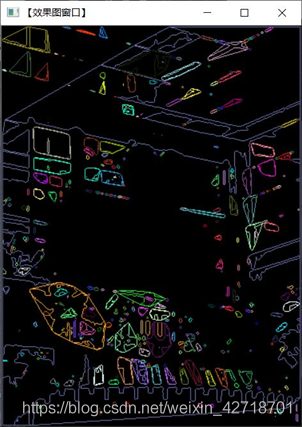
   (iii) Finding image contours using the findContours function in OpenCV;

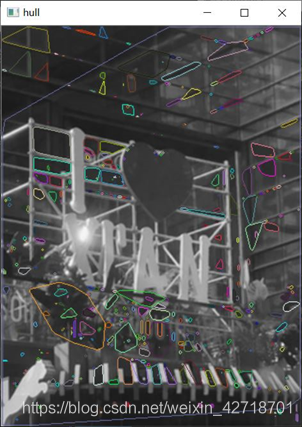
   (iv) Iterate over each contour and use convexHull in OpenCV to find its convex package;

   (v) Write code to draw the image contours and their convex packages using the drawContours function in OpenCV.

Experimental apparatus, equipment

  A computer with Windows 7 operating system and Visual Studio 2015 installed

Experimental principle

   (i) Convex Hull is a common concept in computational geometry (graphics). In simple terms, given a set of points on a two-dimensional plane, a convex hull is a convex polygon that connects the outermost points to form a polygon that is capable of containing all the points in the point set. One of the more useful ways to understand the shape or corridor of an object is to compute the convex envelope of an object.

   (ii) In OpenCV, the convexHull function is used to find the convex packet of an image point set.

Experimental steps

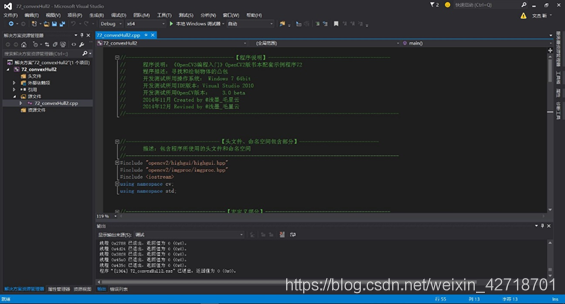
   (i) Create a Visual Studio 2015 console program;

   (ii) Configure OpenCV in Visual Studio 2015;

   (iii) Write code to find image contours using the findContours function;

   (iv) Write code to iterate over each contour and use the convexHull function to find its convex package;

   (v) Write code to plot the image contours and their convex packets.

Experimental notes

   (i) Configure OpenCV in VS after completing the installation of OpenCV;

   (ii) The functions and usage of the findContours function;

   (iii) The functions and usage of the convexHull function;

   (iv) the functions and usage of the drawContours function.

Experimental results

   (i) experimental code
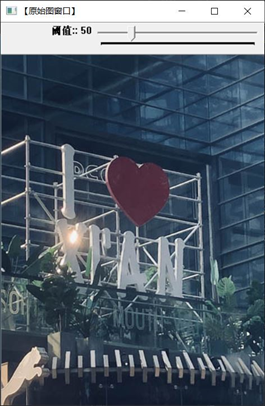
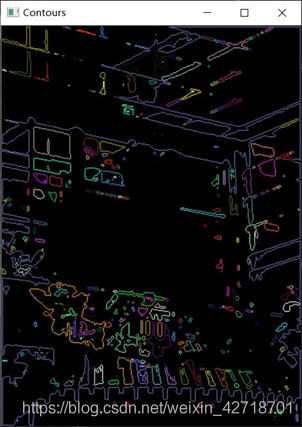
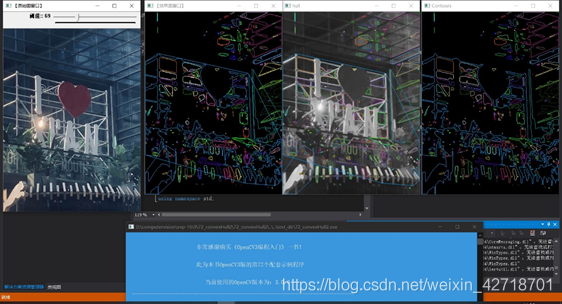
  1
  2
  3
  4
  5
  6
  7
  8
  9
 10
 11
 12
 13
 14
 15
 16
 17
 18
 19
 20
 21
 22
 23
 24
 25
 26
 27
 28
 29
 30
 31
 32
 33
 34
 35
 36
 37
 38
 39
 40
 41
 42
 43
 44
 45
 46
 47
 48
 49
 50
 51
 52
 53
 54
 55
 56
 57
 58
 59
 60
 61
 62
 63
 64
 65
 66
 67
 68
 69
 70
 71
 72
 73
 74
 75
 76
 77
 78
 79
 80
 81
 82
 83
 84
 85
 86
 87
 88
 89
 90
 91
 92
 93
 94
 95
 96
 97
 98
 99
100
101
102
103
104
105
106
107
108
109
110
111
112
113
114
115
116
//---------------------------------【头文件、命名空间包含部分】---------------------------
//		描述:包含程序所使用的头文件和命名空间
//-------------------------------------------------------------------------------------
#include "opencv2/highgui/highgui.hpp"
#include "opencv2/imgproc/imgproc.hpp"
#include <iostream>
using namespace cv;
using namespace std;


//-----------------------------------【宏定义部分】----------------------------------
//  描述:定义一些辅助宏 
//-------------------------------------------------------------------------------------
#define WINDOW_NAME1 "【原始图窗口】"					//为窗口标题定义的宏 
#define WINDOW_NAME2 "【效果图窗口】"					//为窗口标题定义的宏 


//-----------------------------------【全局变量声明部分】-------------------------------
//  描述:全局变量的声明
//------------------------------------------------------------------------------------
Mat g_srcImage; Mat g_grayImage;
int g_nThresh = 50;
int g_maxThresh = 255;
RNG g_rng(12345);
Mat srcImage_copy = g_srcImage.clone();
Mat g_thresholdImage_output;
vector<vector<Point> > g_vContours;
vector<Vec4i> g_vHierarchy;


//----------------------------【全局函数声明部分】--------------------------------------
//   描述:全局函数的声明
//-------------------------------------------------------------------------------------
static void ShowHelpText( );
void on_ThreshChange(int, void* );
void ShowHelpText();

//-----------------------【main( )函数】------------------------------------------
//   描述:控制台应用程序的入口函数,我们的程序从这里开始执行
//------------------------------------------------------------------------------------
int main(  )
{
	system("color 3F");
	ShowHelpText();

	// 加载源图像
	g_srcImage = imread( "2007_000804.jpg", 1 );

	// 将原图转换成灰度图并进行模糊降
	cvtColor( g_srcImage, g_grayImage, COLOR_BGR2GRAY );
	blur( g_grayImage, g_grayImage, Size(3,3) );

	// 创建原图窗口并显示
	namedWindow( WINDOW_NAME1, WINDOW_AUTOSIZE );
	imshow( WINDOW_NAME1, g_srcImage );

	//创建滚动条
	createTrackbar( " 阈值:", WINDOW_NAME1, &g_nThresh, g_maxThresh, on_ThreshChange );
	on_ThreshChange( 0, 0 );//调用一次进行初始化

	waitKey(0);
	return(0);
}

//---------------------------【thresh_callback( )函数】----------------------------------
//      描述:回调函数
//-------------------------------------------------------------------------------------
void on_ThreshChange(int, void* )
{
	// 对图像进行二值化,控制阈值
	threshold( g_grayImage, g_thresholdImage_output, g_nThresh, 255, THRESH_BINARY );

	// 寻找轮廓
	findContours( g_thresholdImage_output, g_vContours, g_vHierarchy, RETR_TREE, CHAIN_APPROX_SIMPLE, Point(0, 0) );

	// 遍历每个轮廓,寻找其凸包
	vector<vector<Point> >hull( g_vContours.size() );
	for( unsigned int i = 0; i < g_vContours.size(); i++ )
	{  
		convexHull( Mat(g_vContours[i]), hull[i], false );
	}

	// 绘出轮廓及其凸包
	Mat drawing = Mat::zeros( g_thresholdImage_output.size(), CV_8UC3 );
	Mat drawing1;
	cv::cvtColor(g_grayImage, drawing1, cv::COLOR_GRAY2BGR);
	Mat drawing2 = Mat::zeros(g_thresholdImage_output.size(), CV_8UC3);

	for(unsigned  int i = 0; i< g_vContours.size(); i++ )
	{
		Scalar color = Scalar( g_rng.uniform(0, 255), g_rng.uniform(0,255), g_rng.uniform(0,255) );
		drawContours( drawing, g_vContours, i, color, 1, 8, vector<Vec4i>(), 0, Point() );
		drawContours( drawing, hull, i, color, 1, 8, vector<Vec4i>(), 0, Point() );
		drawContours( drawing1, hull, i, color, 1, 8, vector<Vec4i>(), 0, Point() );
		drawContours(drawing2, g_vContours, i, color, 1, 8, vector<Vec4i>(), 0, Point() );
	}

	// 显示效果图
	imshow( WINDOW_NAME2, drawing );
	imshow( "hull", drawing1);
	imshow( "Contours", drawing2);
}


//-----------------------------------【ShowHelpText( )函数】-----------------------------
//		 描述:输出一些帮助信息
//-------------------------------------------------------------------------------------
void ShowHelpText()
{
	//输出欢迎信息和OpenCV版本
	printf("\n\n\t\t\t非常感谢购买《OpenCV3编程入门》一书!\n");
	printf("\n\n\t\t\t此为本书OpenCV3版的第72个配套示例程序\n");
	printf("\n\n\t\t\t   当前使用的OpenCV版本为:" CV_VERSION );
	printf("\n\n------------------------------------------------------------------\n");
}

   (ii) Show results

Find and draw convex packets of objects experimentally 1

Find and draw convex packets of objects experimentally 2

Find and draw convex packets of objects experimentally 3

Find and draw convex packets of objects experimentally 4

Find and draw convex packets of objects experimentally 5

Find and draw convex packets of objects experimentally 6

Experiment Summary

  The main content of this experiment is to understand the basic principles of using convex packages; to master the code writing method to understand the shape of objects or corridors by convex packages using OpenCV. Create a new project, configure OpenCV in VS2015, use the findContours function in OpenCV to find the image contours; traverse each contour and use convexHull in OpenCV to find its convex package; write code to draw the image contours and their convexity using the drawContours function in OpenCV. Learn to find the image contours with the findContours function; learn to find their convex packages with the convexHull function; learn to draw the image contours and their convexity with the drawContours function.

Built with Hugo
Theme Stack designed by Jimmy